Image viewer drawing tools
INSApplies to the
InSight ANM20Applies to the
Mars 2020 ANMERApplies to the
MER ANMSLApplies to the
MSL ANPHXApplies to the
PHX AN
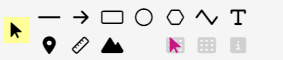
There are seven tools available for drawing shapes on an image: line, arrow, rectangle, ellipse, polygon, polyline, and text. Use these tools to add annotations to an image.
Drawing tools
Use the drawing tools to annotate the image.
Adding a new shape
Select a tool from toolbox (shown below) or from the Draw menu in the toolbar. Instructions for using the tool appear above the image. When a shape is added, the Drawing list in the Function panel is updated.
| Tool | Add a new shape by selecting the shape tool and then... |
|---|---|
| Line Arrow |
Click at the desired start point. Then click at the desired end point to complete the shape. |
| Rectangle |
Click at the desired point for one corner. Then click at the opposite corner to complete the shape. |
| Ellipse | Define the rectangle that circumscribes the ellipse. Click at the desired point for one corner. Then click at the opposite corner to complete the shape. |
| Polygon | Click on the image to define each vertex. Right-click on the image or click the Complete button to close the polygon and complete the shape. |
| Polyline | Click on the image to define each vertex. Right-click on the image or click the Complete button to complete the shape. |
| Text | Click on the image to define the starting point. Enter the text into the dialog box and click the OK button to complete the shape. |
Working with shapes
You can modify the appearance and location of shapes to fit your particular needs. Existing shapes are listed in the Drawing list in the Function pane.

To select a shape, click on the shape from the Drawing list. Doing so will highlight the shape in the image and will also open the shape settings directly below the Drawing list.
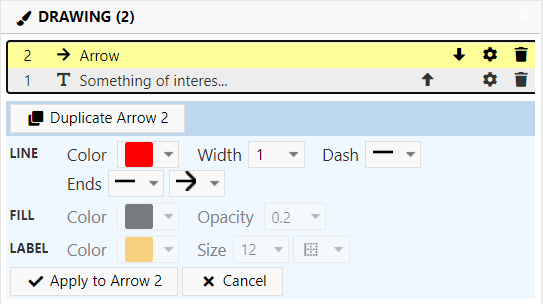
Changing the style
To change the style of a selected shape, choose the desired options in the settings and click the Apply button. In the example image above, you can either apply changes to the selected rectangle or to all rectangles.
Some settings may not be used, depending on the shape. For example, Text shapes do not use the fill color.
To set the fill color, choose the desired color and opacity from the Fill settings. The "X" box in the color drop down represents "no fill".

Changing the location and size
Reposition a selected shape by dragging it around on the image. Lines, arrows, and hollow (non-filled) shapes may be a little difficult to "grab" with the mouse. Try grabbing the lines to move them.
Resize a selected shape by dragging the handles at the edges of the shape. Text must be resized using the Label Size option in the shape settings.
Changing the drawing order
Shapes appear in the Drawing list in order that they are drawn on the image. The shape at the top of the list is on top of all other shapes. Click on the reorder icons ( and ) in the Drawing list to reorder how the shapes are drawn.
Duplicating a shape
Like a particular shape? You can make a copy by selecting the shape and then clicking the "Duplicate" button above the shape settings.
Deleting a shape
Delete a shape by clicking the delete icon () next to the shape in the Drawing list. You can delete all drawing shapes by selecting Draw > Delete all shapes from the toolbar.
Downloading the results
Download the measurement data and annotated image from the File menu. See Downloading the results in the Image viewer topic.